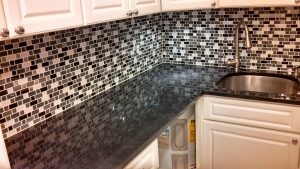
 A tile kitchen backsplash is an involved project that, nonetheless, can add life and interest to your kitchen. There are some ways to have an easy, quick installation – mosaics on mesh backing or peel-and-stick tile being two of them – but if you want a long-lasting backsplash, the best way to install one is to use tile adhesive to install it directly on top of your drywall.
The easiest way to do this, of course, is to contact an expert like Parada Kitchens. If you’re determined to do it yourself, though, here’s a quick how-to.
Tools and Materials
You’ll want to have tiles and tile adhesive, of course, as well as grout and flexible caulk to fill in the gaps between them. As far as tools, you’ll want to have most of the following:
- Tape measure
- Level
- Tile cutter
- Tile saw
- Notched trowel
- Rubber grout float
- Goggles
- Latex gloves
- Sponge
- Tile spacers
Most of these items can be found at your local home improvement store at very reasonable prices, though some tools obviously will get more regular use than others.
Preparing the Walls
The first thing you’ll want to do is cut the power to your kitchen – you’ll want to tile right up to outlets and switches, and current there could cause quite an unpleasant shock. Tape off outlets and cabinets, to reduce risk of any spillage or other extraneous material causing issues.
You’ll want to attach a ledgerboard – essentially, just a straight piece of wood that’s used for support, screwed into the wall studs where the bottom edged of your backsplash will be. This will be removed once the adhesive cures, but it insures that you’ll get a nice, straight edge.
Make sure you clean your walls thoroughly before beginning – we recommend a combination of trisodium phosphate and water – and sand and degloss any glossy surfaces. If there are any dents or ripples in your wall, you’ll want to fill them in with joint compound in order to have a nice, flat surface.
Plan your Layout
A good plan can make everything go much smoother, compared to just slapping tile on the wall and playing things by ear. Find the center point of your planned backsplash, and mark a vertical line – that’s the center you’ll build your pattern around. We recommend dry-laying your tiles horizontally on your countertop, to make sure that you have the perfect width, before applying any tiles to the wall itself. Use your tile spaces to check the ends. Also, try to ensure that cut tiles will be hidden under cabinets – it will create a more pleasing look when all is said and done. If your countertop isn’t level, you may have to cut from the bottom to get a level finish.
Attach the Tile
Your chosen tile adhesive will have instructions on how to mix it. After doing so, spread a small section of wall, using your drywall trowel. You’ll want to work in small sections, because your adhesive will dry quickly.
Place your first piece of tile into the wall, with a little twist to ensure that it sticks. Press against it with the rubber float to seat it in the adhesive. Remember to leave about an eighth of an inch gap at the countertop, to allow for expansion! You’ll want to repeat this process – small section by small section, until you’ve tiled the entire area. Then, let the adhesive dry for 24 hours, and you’re ready to grout.
Apply grout diagonally across tiles using a rubber float to press it into the joints. Wait 10 minutes, then wipe away excess with a sponge using a diagonal motion. Make sure you don’t wipe the grout away from the joints themselves! Once the grout is dry, you can then apply grout sealer to seal the grout. Finally, any expansion gaps can be filled with caulk or silicone sealant.
And, as always, if you’d prefer to have the professional touch – or simply want to ensure a knowledgeable expert makes sure every step is done properly – contact the experts at Parada Kitchens!
